AllMorgan

Visit us on

  • Email
  • Facebook
  • Instagram
  • LinkedIn
  • Pinterest
  • RSS
  • YouTube
  • Home
  • About
  • Beekeeping
  • Homesteading
  • Winemaking
  • Genealogy
    • The Morgan Family Today
    • Getting Started in Genealogy
    • Favorite Genealogy Links
  • Store
You are here: Home / Archives for food/culinary

Seasoned cauliflower & quinoa burgers

May 7, 2021 by Jason Leave a Comment

My take on the cauliflower burger. I love cauliflower and have always just made the steaks where you slice drizzel with oil and season the way you like before baking. The first time I tried a cauliflower burger, I was in love all over again.

I drove over to a friends house, and pulled into his driveway… before I could get out, he jams this sandwich in the window and said “here, try this and tell me what it is.” Being the foodie I am, I happily obliged.

A nice bun, onions, pickles and something that appeared fried. Taking a bite, it was firm and steamy. Delicious. With the pickles and onions, I said “a mild white fish.” Wow, I couldn’t have been further off. The sandwich was from a reputable local establishment. They had their process. Cauliflower. Steamed just enough, pulsed in the food processor to leave some chunk… and mixed with a delicious spice profile.

I had to try and recreate it. So first, like always… Google. There is no shortage of cauliflower recipes out there, each with their own take. I selected the one that sounded like it could render the result I was looking for. It turned out pretty good, but it was far off. The texture was much finer than the chunkier, white fish-like interior of my first. It also lacked the caramelized crust that I actually thought was breading.

So for the next attempt, I spent more time thinking about the process. I cut the florets off a head of cauliflower and washed fewer bigger pieces.

Then, laid them out on parchment paper in a sheet pan. I keep olive oil in a sprayer for times like these. Spray the florets (or drizzle) liberally with olive oil, and sprinkle with salt, pepper and cumin.

Bake for 30 minutes. While it’s baking, rinse 1 cup of quinoa, drain and add 2 cups of water and bring to a boil on the stove. Once boiling, cover and simmer for 15 minutes. Don’t ovecook this. After 30 mins, take the lid off and fluff, and leave aside to cool.

When the cauliflower comes out of the oven, you want it soft enough to bite, but still firm. You don’t want it anywhere near mushy as they still have to hold up in the food processor and the mixing.

Transfer these big, seasoned chunks into the food processor in shifts, not all at once. No stacking.

Pulse a few times and dice it to your desired consistency. I like it chunky, but there is a point where too large of chunks will not let it hold together and they will break apart during cooking. Let’s say no smaller than rice, and no larger than peanuts. Well, for me, maybe a bit larger. Finish pulsing the rest of your cauliflower.

Next, make up your spice mix. The options are unlimited here, but here’s what I did.

To a mixing bowl, add 1 cup of fine breadcrumbs and the quinoa. To that, add 3 eggs and 3/4 cup of grated asiago, parmesan or your favorite hard cheese, 1 Tbs of olive oil, 3-4 cloves of crushed garlic and 1 tsp of cumin. I also added a Tbs of my homemade Worcestershire sauce. If you want it spicy, add cayenne pepper flakes. I had to hold them this time because this was the family dinner tonight.

To this bowl of goodness, add your grated/pulsed cauliflower and mix well. During this mixing, you may break up some of the larger pieces as well. Again, too large of pieces won’t let the binder hold it together (which is mainly the eggs and gluten from the breadcrumbs).
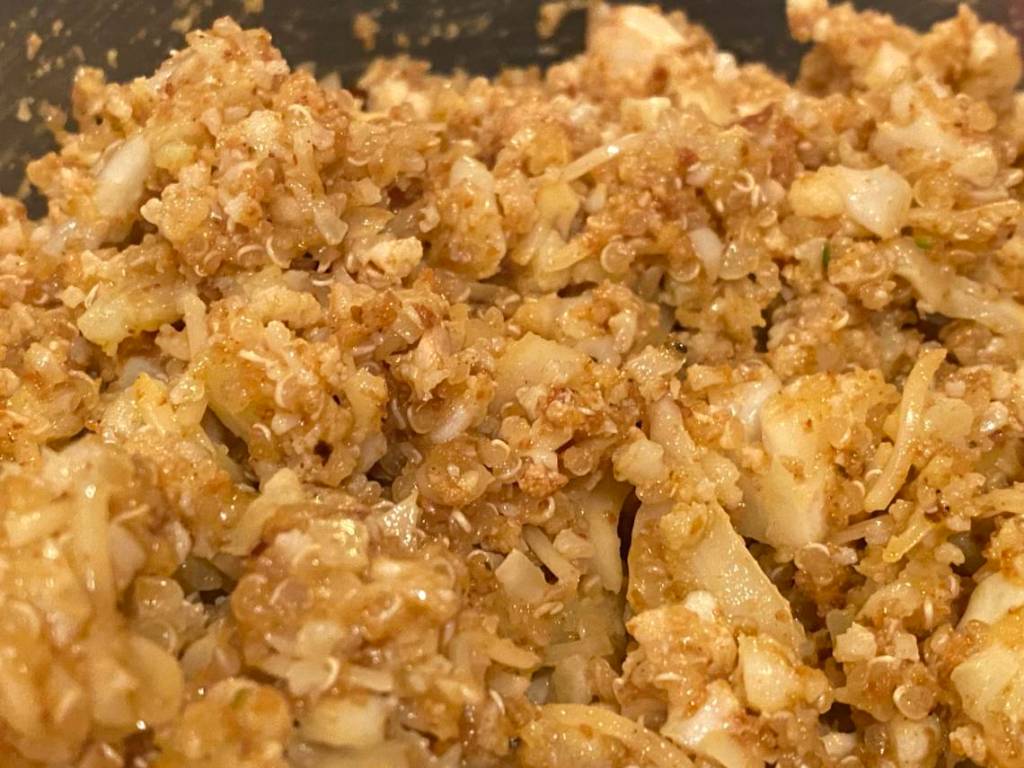
Form the patties and heat an iron skillet with some olive oil up to high heat. Add the just-made patties, listen for the sizzle, then turn the heat down to medium. They fry up nice in the iron skillet right away.

I make a double batch, form them into patties and par-freeze before vac sealing. They make a quick meal later. I have also laid the frozen patties on the grill and slow grilled, flipping only once.

With about 6-7 minutes on each side over medium heat, they caramelized up nicely, and had the crispyness of something battered and fried.

From here, choose your bun. I’ve tried a basic potato bun that was fantastic, and this go-round, I used some sourdough I made earlier in the day. Add your favorite condiments. Pickles and onions are essential for me, and on my next ones, I’ll add pickled onions. Some cilantro doesn’t sound half-bad… and if you really want to be bad, add a dollop of chipotle mayonaise. Tarter sauce if you are heading toward a fish-like sandwich.

You can see how easy it is to change these up to your tastes. You can even manage to make it vegan or vegetarian. Hold the eggs and cheese, and cook the quinoa longer. The gluten from the bread crumbs also helps bind. You can drop the breadcrumbs and find a more preferred binder to add in to help hold it together when cooking. Have fun.

Share it:

  • Click to share on Facebook (Opens in new window)
  • Click to share on Twitter (Opens in new window)
  • Click to share on Pinterest (Opens in new window)
  • Click to share on Reddit (Opens in new window)
  • Click to email a link to a friend (Opens in new window)
  • More
  • Click to share on Tumblr (Opens in new window)
  • Click to share on LinkedIn (Opens in new window)
  • Click to share on Pocket (Opens in new window)
  • Click to print (Opens in new window)

Filed Under: food/culinary, health, recipe Tagged With: food/culinary, health, recipe

Mushroom Jerky

May 27, 2019 by Jason Leave a Comment

During morel season, sometimes you come home empty-handed. But, better than that, one could come home with a few dryads saddles i.e. pheasant backs. If really lucky, one could find a huge lions mane mushroom. Well, I was lucky to find all the above. It was a great year for morels… and I never have problems finding the saddles. This year, I found my first lions mane mushrooms… three in fact. It took me two weeks creating various recipes to use them up and it was easy. Both saddles and lions manes are thick and fleshy and can be easily marinated and cooked like chicken.

It made sense to take it a notch further. What about jerky? If I’m marinating it before searing, what about marinating it before drying? So, I mixed up a jerky marinade and tried drying them out. It was a raging success and it’s something I can’t wait to do again. To be clear, I didn’t invent it, but I remember seeing someone do it with saddles in the past and it’s been on the list to do ever since.

The base of my marinade is comprised on whatever Mexican chili peppers I have on hand. This time, it was a pasilla, two guajillos an ancho and a chipotle. Now, I was calling it vegan… but I cheated (I’m not vegan after all). I put Worcestershire sauce in it (it’s fermented with anchovies)… but vegans can just hold that if they like. Soy sauce, or a nutritional yeast can give it a umami profile.

It was about a total of 1 pound of saddles + lions manes, the peppers, and to the marinade, I added eye-balled amounts of salt, pepper, soy, worchestershire, lemon juice and curry powder. Obviously, you can get creative and even use an entirely different recipe. Use your favorite jerky marinade. I just knew I wanted something thick so that it stuck to the shrooms even after it was dry. The chili’s turned to a paste that was even a little sticky once it was dry. It really could pass for a meat jerky.

See the captions on the photos for detailed info, and if you try it, post below and let me now how it turned out!

  • Cleaned and quartered lions mane.
  • Cleaned and sliced saddles.
  • L-R, Guajillo, Ancho, Pasilla and Chipotle.
  • Chilis boiled in a little water to soften for pureeing.
  • Peppers deseeded, boiled with a little water, and blended to a puree in a food processor. Other spices added.
  • The shrooms are mixed real good in the marinade.
  • I covered them with plastic wrap and put in fridge for about 12-20 hours.
  • Laid out in dehydrator and dried on low heat.
  • The finished stuff, looks and smells like jerky and to a vegan (that I am not) the taste was working well!
  • Close up of mushroom jerky.

Share it:

  • Click to share on Facebook (Opens in new window)
  • Click to share on Twitter (Opens in new window)
  • Click to share on Pinterest (Opens in new window)
  • Click to share on Reddit (Opens in new window)
  • Click to email a link to a friend (Opens in new window)
  • More
  • Click to share on Tumblr (Opens in new window)
  • Click to share on LinkedIn (Opens in new window)
  • Click to share on Pocket (Opens in new window)
  • Click to print (Opens in new window)

Filed Under: food/culinary, recipe Tagged With: food/culinary, recipe

Wild Ramp Chip Dip

April 29, 2019 by Jason Leave a Comment

We generally eat pretty healthy around here… but when we’re looking for creative ways to use up our healthy foraged edibles, splurging a little on some junk food seems OK for the occasion.

Ramp chip dip isn’t an invention of mine. In fact, I found the idea as I was surfing the net looking for things to make. The ramp harvest where I am is very generous each year and I’d like to think it’s because we pay close attention to sustainably harvesting them.

So when there are ramps, we dehydrate them, make dinner sides, make a sort of kraut with it, and for the next performance, create a chip dip. Let’s call it our version of a green onion chip dip. I found a number of approaches on the internet, but this one is fine-tuned to my style.

I added my maple sugar to the skillet since it was kind of caked together

I took about 8-10 oz of green ramp leaves (both the tricoccum and the burdickii varieties) and chopped them up into 1/8″ pieces. Slop 2 tablespoons of real butter in an iron skillet. Once melted add in a clove or two of minced garlic and just when it starts to brown, add the chopped ramp greens and stems. Prepare the following:

  • 2 tbs. of maple sugar (or a sweetener you like)
  • 4 ozs or cream cheese (half a pack)
  • 8 ozs of sour cream

The above amounts are not strict, cut down on the sweetener, or omit it altogether. I produce my own maple syrup and sugar and so I use that. Mix the above together and get it well-integrated in prep to dump the ramp greens in at the last step.

When the ramp greens are wilted and starting to brown, add 3-4 tbs. of your favorite vinegar to deglaze the skillet. Of course, I use Mad House Vinegar every time I can. Once done, add the greens to the cream cheese mixture and stir well. Salt and pepper to taste… but I ended up using my smoked ramp salt that has both powdered ramp greens, and garlic in it too. Grab your chips and dig in, but I’m making sure to save some for using on top of my next baked potato.

  • Chop your ramp greens
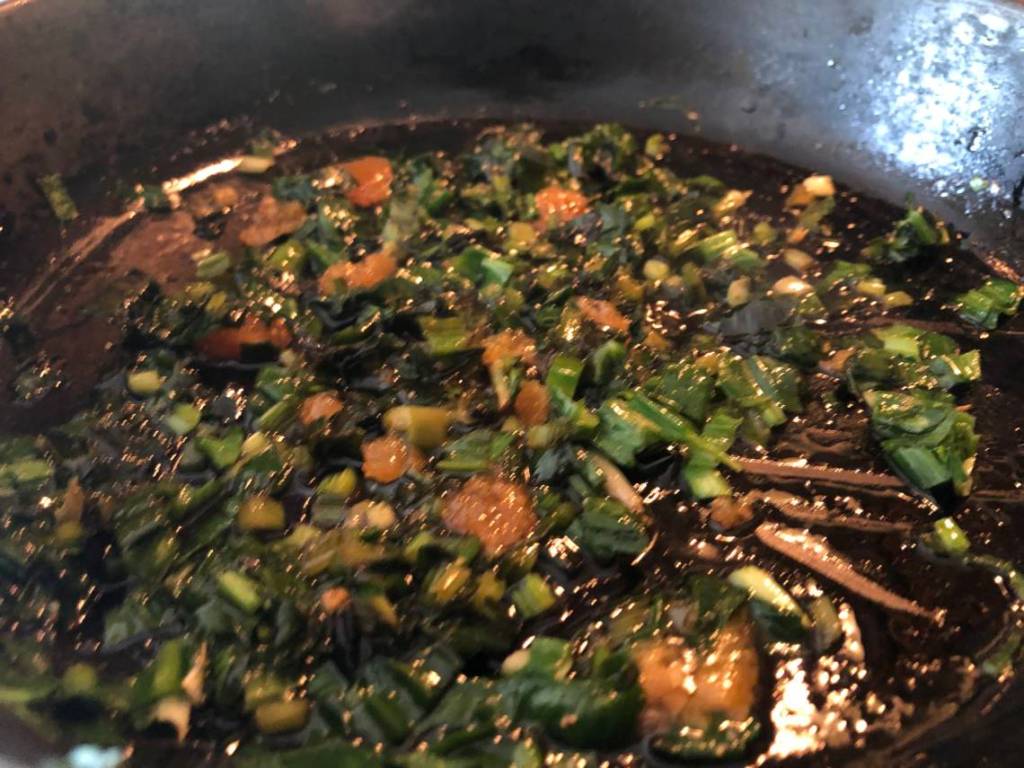
  • Saute the ramp greens in the butter and a little S&P
  • I added my maple sugar to the skillet since it was kind of caked together
  • Mix the cream cheese and sour cream. I also added some ramp salt
  • Mix the greens into the sour cream and stir well
  • I like corn chips for dipping

Share it:

  • Click to share on Facebook (Opens in new window)
  • Click to share on Twitter (Opens in new window)
  • Click to share on Pinterest (Opens in new window)
  • Click to share on Reddit (Opens in new window)
  • Click to email a link to a friend (Opens in new window)
  • More
  • Click to share on Tumblr (Opens in new window)
  • Click to share on LinkedIn (Opens in new window)
  • Click to share on Pocket (Opens in new window)
  • Click to print (Opens in new window)

Filed Under: food/culinary, homesteading, how-to, recipe Tagged With: food/culinary, homesteading, how-to, recipe

Wild Ramp Kraut

April 23, 2019 by Jason Leave a Comment

Yet another application for the wild ramps. I have been reading about kraut and kimchi. I love both, and as I thought about all the ramp greens I had, it made sense to get some of this going. Of course I’m not inventing anything new, but thinking about how delicate ramp leaves are, I envisioned the greens withering down into a soft green mass after salting, pounding and stuffing tight into jars.

I grabbed a head of cabbage and shredded just as I would when I make sour kraut. Then, I chopped all the ramp greens into 1-2″ pieces and mixed well. I specifically wanted to have more ramp greens than cabbage. The cabbage was just there to add structure and crunch. I had a total weight of 2843g of ramp greens and cabbage, and to that, I settled on 3% salt.

Shredded cabbage, and chopped ramp greens.

I put everything into a 5g clean bucket to pound it down. The idea here is to bruise everything up and get it to create its own brine. There should be no need to add any water. I made two variations. The first was cabbage, ramps and caraway seed. The other was the same, plus some shredded carrots and dill.

Give everything a mix and make sure the salt is evenly distributed. The brine will release pretty quickly, so it also helps to get things integrated. Finally, pack everything tightly into jars. I save a few whole cabbage leaves to use on the top, just under my weight. The idea is to keep everything under the surface of the brine. This prevents mold from growing. If you do this right, it’s one of those things you’ll be able to set and forget until it’s done. I do use the special lids that have an air vent in the top for wide mouth mason jars. This particular set comes with 4 lids, 4 glass weights and a tamper to pack the kraut down in the jars. Crocks are great, but for smaller test batches of stuff, using wide mouth jars is less maintenance. I always have a jar of kraut ready to open. Having it in multiple jars keeps the smell and bugs down… and I NEVER have any problems with mold starting. Here’s the same set without the tamper and slightly cheaper.

  • Ramps, leaves only harvested in bucket.
  • Shredded head of cabbage.
  • I collected a single ramp with its bulb just for showing. It’s these bulbs and their roots that we want to leave in the ground.
  • Pounding down the cabbage and ramps to make a brine.
  • Two variations… ramps, and ramps + carrots.

Share it:

  • Click to share on Facebook (Opens in new window)
  • Click to share on Twitter (Opens in new window)
  • Click to share on Pinterest (Opens in new window)
  • Click to share on Reddit (Opens in new window)
  • Click to email a link to a friend (Opens in new window)
  • More
  • Click to share on Tumblr (Opens in new window)
  • Click to share on LinkedIn (Opens in new window)
  • Click to share on Pocket (Opens in new window)
  • Click to print (Opens in new window)

Filed Under: food/culinary, homesteading, how-to, recipe, Uncategorized Tagged With: food/culinary, homesteading, how-to, recipe

Wild Ramp Salt

April 23, 2019 by Jason Leave a Comment

Here’s a pretty clever thing you ramp harvesters can do when you’re wanting to prolong the magic of the season, so to speak. I have a culinary bone that needs constant feeding, and when I grill or smoke, I have an assortment of rubs that I tend to have ready-made. I’ve ground the dehydrated tomato skins left over from my sauces to make a tangy tomato powder base for other rubs. I’ve also dehydrated halved garlic cloves to make my own powder. Well, it just seemed downright necessary to make a ramp-based salt or rub with all these ramp leaves. It’s easy.

Clean your leaves and lay them out to dry. I put my leaves in a dehydrator… and they readily dehydrate. It only took a couple of hours with a little heat added. You can also cold-smoke the leaves initially if you want to add a bit of natural smoke but you’ll see how I faked it with the smoked salt in a moment. You’ll eventually add some kind of salt, and I’d suggest either a kosher or sea salt… basically, something with a course grind.

Grinding dried ramp leaves and salt a portion at a time.

I have a stash of applewood smoked sea salt that I used to blend in. This particular salt is almost overly smoky so I thought skipping the cold-smoking was prudent this time around. I took the dehydrated leaves, crunched them up and stuff them in my spice grinder along with a certain amount of salt. I like to grind the salt with the dehydrated leaves to help integration, and by the time it’s done, you really can’t see the salt. It leaves a nice, earthy, salt blend, ready to sprinkle right on food… use as a rub, or used in the other curing applications. Later on, I did manage to add in some of my homemade garlic powder. I can’t wait to get this into some charcuterie.

If you have any other clever ideas on making salts and rubs, I’d love to hear them. In the meantime, here’s a few pics of the process.

  • Ramps cleaned and drying.
  • Dehydrated leaves crunch up easily.
  • Sifting to get a consistent blend.
  • Ramps ready for the grinder, and the resulting mixture.
  • This does have the salt in it and it was sifted into a slightly finer powder.

Share it:

  • Click to share on Facebook (Opens in new window)
  • Click to share on Twitter (Opens in new window)
  • Click to share on Pinterest (Opens in new window)
  • Click to share on Reddit (Opens in new window)
  • Click to email a link to a friend (Opens in new window)
  • More
  • Click to share on Tumblr (Opens in new window)
  • Click to share on LinkedIn (Opens in new window)
  • Click to share on Pocket (Opens in new window)
  • Click to print (Opens in new window)

Filed Under: food/culinary, homesteading, how-to, recipe, Uncategorized Tagged With: food/culinary, homesteading, how-to, recipe

  • 1
  • 2
  • 3
  • …
  • 10
  • Next Page »

Search the site

Recent Posts

  • Seasoned cauliflower & quinoa burgers May 7, 2021
  • Preserved Black Walnuts January 17, 2020
  • Nocino Walnut Liqueur July 25, 2019
  • Requeening honeybee colonies with cells July 9, 2019
  • Mushroom Jerky May 27, 2019

Archives

Categories

  • beekeeping (40)
  • charcuterie (13)
  • cheesemaking (7)
  • do-it-yourself (15)
  • family (20)
  • food/culinary (47)
  • friends (21)
  • gardening (3)
  • genealogy (15)
  • grape growing (10)
  • health (3)
  • homesteading (38)
  • how-to (67)
  • music (3)
  • outdoors (30)
  • rants (6)
  • recipe (21)
  • Uncategorized (40)
  • videos (22)
  • winemaking (21)

About AllMorgan

AllMorgan started as a family blog to keep extended family and friends around the world apprised on what's going on at the Morgan Ranch. Over the years, it grew in to something so much more.

Learn More

Welcome to AllMorgan

AllMorgan started as a family blog to keep extended family and friends around the world apprised on what's going on at our Indiana homestead. It always been a cross between a family diary and photo … Read more

Did you know?

The queen bee doesn’t decide what happens in a colony. The workers do. They adjust her feeding to make her do what the majority says. The queen can’t feed herself.

Copyright © 2025 · Outreach Pro on Genesis Framework · WordPress · Log in