My first trials into maple sugaring started in 2014. So start there if you want to see the first version of the maple arch. Sugaring was something I always wanted to do since watching my dad do it as a boy. I made it happen last year by grabbing some spiles and buckets over the internet and got it going. I also scored an evaporator pan to boil the sap and built a cinder block arch to hold it.

It did great but eventually cracked from the heat and the changing of the season. Here I am, on year two starting over completely. The new arch was to be free-standing and portable. I also scraped out the area where it would sit. It was a lot of work, but I got by with a lot of help from friends, all of whom share in the rewards. It was a crazy year already and maple season falling at the end of January meant no time to rest.
I scored one of those 250-gallon fuel tasks off Craigslist. The ad said, free, just come take it. I soon found out it was still installed and had about 70 gallons of fuel in it. So the first friend I recruited was Jimmy, who rolled to KY with me to unhook, empty and bring home.


Next, I had to cut out the holes and build a fire in it to burn out all the fuel oil. It was fun making fires in it over multiple days during the cold winter days.

Now the fun started… at least, it was fun at the beginning. I had made up plans of my own after looking over countless ideas and pictures on the internet. I chose the idea that best fit the evaporator pan that I had and made sure that there was maximum fire exposure to the bottom of the pan. My friend Darian was the one who did the welding and metal cutting. He helped me make quick work of things and helped realize the visualization I had on paper. Sparks flew and it really started to shape up. We created a back wall and a ramp that would direct the heat along the bottom side of the pan before going up the flu. It should be noted that another friend, Jeff, contributed some big materials. Particularly the much-needed angle iron that would go around the sides of the maple arch to hold the pan. This was some heavy stuff–surely costly if I had to buy it.


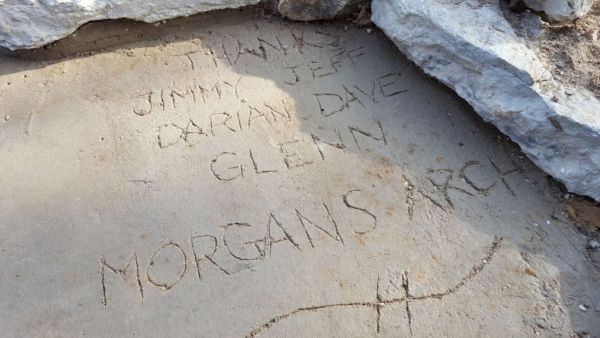
By now, I was ready to get this in place. But, I now needed to revise the area where the arch would site. For this, my late friend Glenn offered to help me out. Glenn and I spent an entire day working out the pad where the arch would sit. Just as a journal entry, Glenn died in an accident on May 28th, just 4 months after helping me with this. He dropped everything to come and help me and would do that a lot to help a friend. God bless him. That’s Glenn in one of the pictures below. We dug and poured footers and a pad for the arch to sit on. He recommended I set up a tent with some kerosene heaters around it to properly cure the cement over the night that was expected to be cold.


With the pad done, it was time to move the arch into place and line it with brink for the firebox. The pics below show how I initially laid it out. I used sand to pack in between the bricks.

The arch looked good out of the gate. I sat a fire grate inside on the brick to raise it up for good air flow. I was already bringing in sap and it was right on time for our first boil. For this, my friend Dave comes over. Dave taps trees too. Dave and I put our sap together and boil it all down at once. Dave also has a sawmill and so he has lot’s of wood to bring and burn. The arch takes plenty of wood too, so Dave plays a pretty critical role here. We got it going and all was going good at first. The fire was hot, and the sap made it to a boil fast. The ash built up fast and the fire couldn’t get air. As a result, it wasn’t burning hot enough. We found ourselves shoveling out ash and disturbing the coals basically cooling the evaporator pan too often, too much. Breaking the boil really slowed things down. We were improvising now. We knew we needed modifications, but we needed to finish this boil first. We cut holes in a pipe and shoved it into the coals to pump air in. It was pretty much a forge now. It helped but created a lot of ash… and of course, it was getting in the syrup. The arch needed some modifications, and fast… as more sap was coming in.


It was time to call Darian back up. I was already sketching out ideas on increasing airflow while we were waiting for the first batch of sap to finish. Thankfully Darian jumped to the occasion and we made modifications damn near the next day. We cut out the bottom of the front, below the door, and welded two large pieces of angle iron along the length of the inside. This was to hold a beefy grate that we made out or rebar. Basically, we created a way for the ash to fall through and be easily shoveled out as needed. See the pics below. The minor modification ended up being pretty significant.


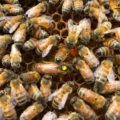
The grate ended up lifting the fire higher up and closer to the bottom of the evaporator pan. This made it so we didn’t need as large of fire so it conserved wood even better now. We found the sweet spot. The ash dropped through the grate and we were able to pull it out the front as needed. The next boil of sap went right on through. The arch was finally doing what we had hoped for. I was running about 27 taps this year, and my friend Dave was running about 12. Here’s a few pics of the trees and taps… and in the backwoods, I used 6-gallon buckets with 1 or two taps going into them. They needed to be emptied once a day.


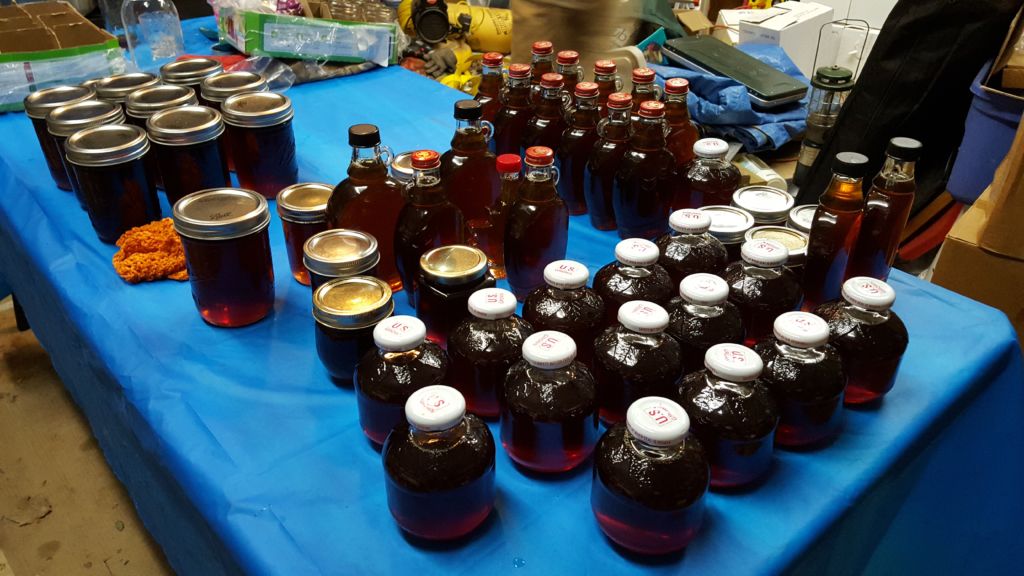
So there we are, another hard, but a successful year of sugarin’. I feel we’ll be ready for 2017 to really put some syrup away. This really was a project that brought together friends for a common cause. I lost my friend Glenn, and that was and still is hard. But, I’m grateful for the time we had together… and his involvement in this project was special to me as was the involvement of many other friends. When I came yellin’ they came helpin’… and for that, I’ll make sure they all have maple syrup every time it comes out of this arch.
I have made a similar arch. Currently I am using buffet dish/pan and a kitchen sink(plate welded on bottom).
Next step of improvement is a tray system like yours. Do you have a design for what you have there?
Hi Mike, I do not. The pan I’m using, I acquired from a friend. It is a hobby-level evaporator pan. “Leader” is the brand name I think… and it was bent up from being flung in a tornado. I had to bend and pound the sides back into place before I could use it. If you have the ability to cut and weld stainless steel, it’s a simple enough design. You could make one to the exact size you need. The fins in the center simply help improve the evaporation and convection.
I see that in the style evap that the warming pan sits on top of the primary evap pan. I would seem that this would be very sticky on the bottom. What temps are achieved in the warming pan? If the design allowed the warming pan to sit on a shelf between the evap pan & smoke stack with direct contact to the top of the arch as it exits to the smoke stack. Would that create to high of a temp in the warming pan?
Mike G
Hi Mike, it’s not sticky at all. I have a number of videos of it in action in my group on FB:L https://www.facebook.com/groups/morganranch/ – It’s only steam coming off the pan so it’s just condensation on the bottom of the hopper. ALL the sugar is the maple syrup that is left in the pan once it’s done. There’s a lot of ways to warm the sap… including wrapping a coil/tube around the stack before it drips into the main pan. The goal is only to add new sap to the lower pan so not to break the boil. As for temps, I’d say 212F or so… just boiling point. However, once the water is gone, the sap heats up like a sugar mixture, and when it hits 220F, it’s done. I really like this setup.
Did you put any bricks in the lower ash area. I’m thinking of doing the same thing but make it so I can slid a catch pan in it. By the way nice job.
No. As it stand now, ash falls through the grate right on to the bottom of the metal tank bottom and I can scoop them out with a shovel.