AllMorgan

Visit us on

  • Email
  • Facebook
  • Instagram
  • LinkedIn
  • Pinterest
  • RSS
  • YouTube
  • Home
  • About
  • Beekeeping
  • Homesteading
  • Winemaking
  • Genealogy
    • The Morgan Family Today
    • Getting Started in Genealogy
    • Favorite Genealogy Links
  • Store
You are here: Home / Archives for Jason

Planting forage for bees and pollinators

February 22, 2015 by Jason Leave a Comment

During the January 2014 Moores Hill SIBA meeting last year, Roy Ballard from Purdue, and Tim Schwipps from the USDA-NRCS came and spoke about planting forage for bees and other pollinators. They made clear that there can be help available at both the state and local levels. I decided to pursue things since I had 1.5 acres that I wanted to do something with and I felt if it meant having some more honey in the hives, as well as some pretty flowers to look out at on my back hill, let’s try it out.

After exhausting all options, I found that having only 1.5 acres did not entitle me to any assistance. This is always changing, so don’t let this discourage you. I know there were a few others in our club that did get assistance since they had more land to work with. To be clear, the state DOES want you to reserve land for wildlife and in many cases, they will help finance some of your materials and effort. You just have to look around and contact the right people who know. I continued to pursue my goals and bank-roll myself since it was only 1.5 acres. Here is my story, and the steps I took. Keep in mind, I will be describing my specific plans in hopes that it can be helpful to someone else. Just be sure to make your own plan before executing.

I’m in Dearborn county and the result of my searches connected me with Chris Grauel who was extremely helpful, and my guide during this entire process.

Chris Grauel, Wildlife Biologist
IDNR/Division of Fish & Wildlife
2010 S. State Hwy. 3
North Vernon, IN 47265-7950
(812) 352-8486

Chris treated me just as if I was someone who was seeding 100 acres of land. He came out and took a look, offered advice and followed up with a detailed step-by-step plan… including a burn plan for my specific area. He also pulled applications for me and made me aware that I needed to contact the right people (local fire, neighbors, etc. at the right time before burning. If you do something like this, definitely have a single point of contact like Chris.

Susan Knowles also accompanied Chris on the visit to my property and she too made many suggestions, and directed me to potential resources… including where to look for wildflower and other seed mixes. Susan suggested depending on mu timing, she may be able to add my seed order on with someone else who was getting a larger order. It didn’t pan out for me… but that is a real option for people like us not sowing 10+ acres.

Susan M. Knowles, Wildlife Biologist Private Lands
Muscatatuck National Wildlife Refuge
12985 E US Highway 50
Seymour, IN 47274
812-522-4352

We started by burning a brush pile, but used torches to do a controlled burn across the hill.

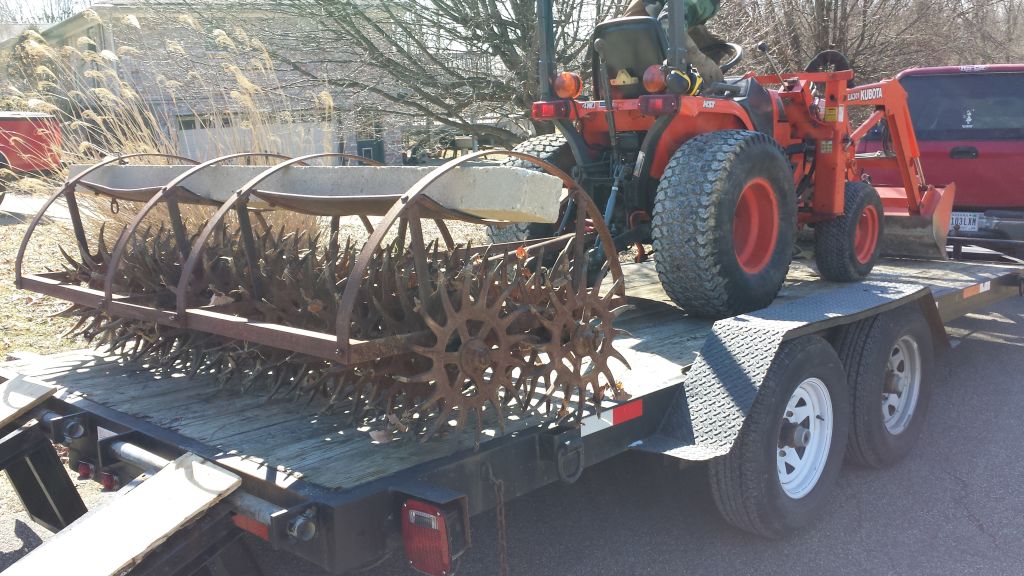
Another key player for me was Vickie Smith at Dearborn County SWCD. When I was getting quotes for 8k worth of fertilizer, she directed me to Laughery Valley Co-op. suggesting I could get it there more reasonable. For my situation, bulk fertilizer, from Laughery Valley Co-op ran me $850 – 975.00 per ton (2,000 lbs.). They mix what you need into a buggy that you can pull home behind your truck, and then you do need a tractor with a PTO to spread it. I didn’t have the tractor and elected to have them drop it off to me, and spread it with the help of my brother-in-law who had a smaller tractor and a 500lb. spreader (see pictures). She also reminded me that lime should be applied in the fall before you seed. It will take the lime six months to make a difference, unless you purchase pelleted lime that works more quickly.

Vickie A. Smith, Environmental Technician/Educator
Dearborn County SWCD
10729 Randall Ave., Ste. 2
Aurora, IN 47001
812-926-2406 ext. 3
www.dearbornswcd.org

We tilled a burn perimeter in preparation for the burn.

Vickie also sent me the following:

“If you are interested in planting specifically for honey bees, then be sure to get online and check the seed that you are ordering will be what you’re wanting for honey bees… pollen and nectar source… and most importantly, the seeds have not been treated. I’ve attached a good article on honey bees (the article happened to be written by Kathleen Prough, our State Apiarist.)

With the key people identified, let’s start with my specific plan outlined by Chris Grauel. Believe it or not, the following is edited for brevity.

–Specific plan for converting approx. 1.5 acres to bee pasture–

The open area is approximately 1.4-acres; of which, about 1.0-acre of the area is slightly sloping (<12% slope) and the remaining 0.4-acre is severely sloping (>25% slope). The vegetative cover is composed primarily of tall fescue and smooth brome grasses; and, danced throughout the field are sapling trees. Herein lies the first step to your process of developing this open area; I would suggest mowing the open area once around May 1st, 2014 to suppress these saplings (i.e., to stunt their height) in order to make later herbicide applications less difficult.

The next order of business is to have a soil test performed. Most any farm co-op and seed store can provide this service for a nominal fee (it was free for me, being in Dearborn county at the SWDC); and, some soil and water districts offer soil tests to landowners or can suggest a laboratory to perform the soil analysis. The results of the soil test should include recommendations for any necessary amendments. I would predict the results will include adding lime in order to increase the soil pH; if so, make the application a few months in advance of planting your seed so it has time to incorporate with the soil.

Dropping lime

Next, you must perform a controlled burn (see my specific burn plan) and utilize a frost-seeding method of planting. The steps would be these:

a. Mow the planting area to a height of about 4-6 inches around the first week of September. Then allow about three weeks, or until the mowed grass has put forth about 6 inches of new growth, and spray the planting area with a glyphosate herbicide. Generally the per acre rate is 1½ quart glyphosate herbicide, 3 lbs. of ammonium sulfate and water. Read and follow all directions, rates and warnings as specified on the manufacturer’s label.

b. Next you will need to establish control lines (firebreaks) around the planting area. These can be accomplished by either discing or roto-tilling a 6-foot wide bare soil strip around the perimeter. These strips can be put in place about one-week+ after the spraying was performed.

c. Anytime between after the firebreaks have been put in place and up until February, a controlled burn must be conducted to remove the dead vegetative debris. You will need to contact me a month in advance for a burn plan. This removal should ensure good seed-to-soil contact when the seed is broadcast. Chris Grauel also lent me all the equipment I needed to conduct the burn, including flappers, drip torches, and water pack. He even dropped it off to me in November, and said he’d pick it back up in March. Wow… what a guy!

d. Following the burn, and between Jan. 1st and February 15th, the seed should be broadcast over the area. Frost-heave (freezing and thawing of soil) will work this seed into the soil for later germination in the springtime.

e. It is likely that, although you have killed the grass in the fall, come springtime new grass plants will appear from seed stored in the soilbank. If this does occur, or occurs over following years, a simple application of a grass-selective herbicide will clean these grasses from within your pollinator planting.

Fertilizer delivery

As for species selections and seeding rates, the sky is about the limit (and the size of your wallet). I have attached a USDA list of preferred pollinator plants that should offer good guidance with your choices. As I say, many wildflowers are a bit pricey. You may want to consider planting with a majority of clover species and perhaps including a small amount of wildflowers seeds. There are many clovers that would perform well at your site: crimson, red, white ladino, alsike, white Dutch (what grows in our lawns) and sweet clovers. Clovers will bloom throughout most of the growing season; whereas, most wildflowers have a fairly specific bloom period.

When/if you include wildflowers, choose varieties that will bloom at various times of the season. The seeding rates will hinge on the number of different species you select and what species you choose. Generally when broadcast seeding clover the rate should be in the ballpark of 10 lbs. of seed per acre; and, to that you might include about a pound of wildflowers seed per acre – total of 11 lbs. of seed per acre. And be certain the clover seed you use is either pre-inoculated seed or that you apply the proper inoculants to your seed.

If you want the area planted entirely to wildflowers, a general seeding rate is about 5-8 lbs. of seed per acre; 10 lbs. of a good wildflower mixture can cost around $300 to $400 per acre. Planting with several varieties of clovers is going to run you about $50 to $60 per acre.

20150215_130856
We used a rotary hoe to further fluff up the compaction from bush hogging. Then I lowered the deck of my walk behind to thrash it up.

I settled for a wildflower mixture from Jeff Dittemore at Bee-Friendly Beekeeping (info below). I paid $35 per pound of seed.

10 lbs. Bee Seed (Wildflower) mix $340

Because my hill was pretty steep, I couldn’t disc it without causing a serious erosion problem. This was already evidenced by the 4 foot trough we tilled around the field for our burn barrier eroding already. My method of seeding is frost-seeding. This method probably does cause a little more stress on the seed, but it was my only option. To get maximum soil exposure, I further worked the hill using a rotary hoe lent to me by a friend. It did a good job of breaking up thick tufts of dead grass and material I needed out of the way. After fluffing it up with the hoe, I lowered the deck of my 48″ walk-behind mower. This really thrashed everything up and threw it out of the way. I was very satisfied (see pics below) I mixed the seed with play sand at a ratio of 5lbs. of sand to 1lb. of seed to distribute properly. It was broadcast seeded at a seeding rate of 5-6lbs. of seed per acre the day just before a heavy snow! I am happy about that because it helped hold the seed in place vs. a heavy rain that could have washed it down the hill. We’ll see this spring how things work out.

Here is the information I’ve collected on seed sourcing.

Jeff Dittemore
765-891-1783
Visit Bee Friendly Beekeeping on Facebook

20150215_131515
Mixing wildflower seed with sand.

BFBK Seed Mix. ($35/lb. and 5-6lbs/acre)

Purple coneflower 10%
Dwarf sunflower 10%
Lanceleaf coreopsis 8%
Blanket flower 8%
Blue flax 7%
Perennial lupine 6%
Clasping coneflower 5%
Cilantro 5 %
Prairie coneflower 4%
Mexican hat 4%
Basil 4%
Partridge pea 3%
Prairie aster 3%
Annual lupine 3%
Dwarf annual lupine 3%
Crimson clover 2.5%
Lacy phacelia 2%
California poppy 2%
Lemon mint 2%
Cosmos 2%
Plains coreopsis 2%
Black eyed susan 2%
California bluebells 1%
Showy primrose .5%
Bergamont/bee balm .5%
New England aster .5%

—

20150215_140833
Soil exposure after burning. Not really good since we never had the perfect dry day.

All said here is what it took me to prepare and seed 1.5 acres with a wildflower mixture.

About 10-12 hours (not consecutive) of my time digging soil and sending samples to the lab, calling and emailing people to source reasonable tools to work the land, and running back and forth.

$50 paid to someone to come and bushhog my hill.

4-5 hours with myself and brother-in-law spreading lime and fertilizer.

3,659 lbs. of Fertilizer
4,878 lb/s of Lime
2.1 qts. of Glyphosate
4 lbs. Ammonium Sulfate
10 lbs. Bee Seed (Wildflower) mix  = $340
—-
$1190

4-5 hours and 4 great friends who came and helped me conduct the controlled burn on New Years Day this year.
11 hours of working with my brother-in-law who generously brought over his tractor to spread lime, fertilizer, and prep before seeding.

Here are other places I considered for seed. Just adding it here for your convenience.

20150215_171150
The final soil exposure before seeding.

Laughery Vallery Co-Op
Wayne Jenner sent me the following on their seed mix. ($33.75 lb. and 4-9 lbs/acre
11016 U.S. 50
Dillsboro, IN
(812) 432-5267

—

Applegate Seed House, “Tom” has a mix for pollinators and I did not get the data.
76 E 700 S
Brook, IN 47922
219-275-3664 or 219-863-2136

—

After frost-seeding, I will need to keep an eye on the back hill for growth. It’s no doubt that I will have the weeds I am trying to eradicate begin to emerge. In my plans, there is a suggestion to go through with a selective herbicide when needed. I do not know what this will be, nor the time as of yet. I also know there are many finger-sized stubs of black locust saplings that want to come up across the hill. I suspect I will be manually removing these as I can. Dealing with the past weeds that were on the hill will be interested and I am planning to allot some effort to try and keep it at bay until the new forage takes hold.

May 20, 2015 update on the pollinator pasture (with pics)

Share it:

  • Click to share on Facebook (Opens in new window)
  • Click to share on Twitter (Opens in new window)
  • Click to share on Pinterest (Opens in new window)
  • Click to share on Reddit (Opens in new window)
  • Click to email a link to a friend (Opens in new window)
  • More
  • Click to share on Tumblr (Opens in new window)
  • Click to share on LinkedIn (Opens in new window)
  • Click to share on Pocket (Opens in new window)
  • Click to print (Opens in new window)

Filed Under: beekeeping, do-it-yourself, gardening, how-to, outdoors Tagged With: beekeeping, do-it-yourself, gardening, how-to, outdoors

My first trials into maple sugaring

January 25, 2015 by Jason 4 Comments

See part two to this series here.

I remember my dad tapping maple trees as a kid. He told all the neighbors that if they let him tap their trees, they’d be invited to the “big pancake breakfast” that he’d throw at the end. Today, someone might look at you like you had two heads. It’s amazing how times have changed. Dad had a number of pots he rigged up over a fire… not really worrying about the smoke “tainting” the sap as it cooked down. In fact, I can’t remember anything too terrible about it. It’s a wonderful childhood memory for me… and one I planned to revive.

A beautiful sight when you enter the woods.

As I was gearing up, my wife and some others commented “just what you need, another hobby” but really, I have been thinking, and planning about tapping maple trees for about 2 years now. It happens during a time of year that I consider downtime and I’ve always wanted to try it out just as a homage to dad. So, this was the year.

Sourcing and fixing the evaporator, and building the arch. I was all set to convert a 55-gallon drum into a wood stove and set up some steam table trays on top to evaporate. By a happy coincidence, a fellow beekeeper found out I was interested in getting set up and offered me a deal on an evaporator she used before it was hurled by a tornado. She made me a good deal, so I grabbed it. So while my original plans with the barrel were changed, it was OK since the new set-up was going to be a lot more efficient… after I built the arch.

I picked up the evaporator and had it turned into usable shape by the end of the day. The next morning, I picked up the materials for the arch. It was a simple setup with c-blocks designed to hold the pan, and steer the smoke out the flu and away from the surface of the boiling sap. See the pics below for more details. All setup, I commenced boiling.

Here are the notes I’ve been keeping so that I know how much sap I can cook and for how long.

Ready to cook.
Ready to cook.

Tapping trees, and sap flow. I started with 10 taps at the beginning of this week and collected 6 gallons in the first 24 hours (a good, sunny day). The next two days remained colder and overcast and sap slowed a lot. Today (Sat.) was a bright sunny morning. I went back and some jugs were overflowing. I collected another 6 gallons and came back to boil… starting with 12 gallons of sap.

Cooking and gallons per hour. I started cooking the initial 12 gallons at 1:30 pm. After getting everything situated, I noticed the gallon jug I had up near the house was over half full already. I collected that and rolled out to the backwoods to check those too. I came back with another 5 and a half gallons or so. That’s another 6 gallons. I added it to the warmer and allowed it to trickle into the evaporator. Everything was finished and ready to bring inside at 5:30. So, 18 gallons in 4 hours. That’s about 4-5 gallons per hour. I think I can do better here as I was still getting used to the fire and the new set-up. But, that’s totally reasonable, and I was sad that the fun was over so fast!

Yield. I brought the concentrate inside to finish in a pot on the stove. It went fast. I think I actually cooked it too long. It became thicker than it seemed it was supposed to. Also, it had a very, very sugary taste. It wasn’t terrible, but not what I remembered from when I was a kid. It’s also possible there was some scorching going on too. All said a total of 23 gallons of sap yielded a little over 2 quarts. You can see the jars I filled in the pics below.

Correcting my maple syrup. Reading more about how to thin it… people said to add more sap. Well, I knew there was more out back… so I went out in the dark and collected another 5 gallons. (If you’re keeping track, that’s 17 gallons from 10 taps in one day.) I brought this back and decided to cook this down in two pots on the stove. It definitely took longer (as I sit here at 2:17 am finishing up). All this effort to correct what I think may have been cooking too much water out. Slowly I start consolidating the fresh syrup/sap into the finished to thin it down. It’s tasting better and the consistency is much better. Barring any last-minute issues, I’ll consider it a success for my first attempt.

Update 2-14: We just boiled another 85 gallons of sap. It took 12 hours from the main evaporator to the pot inside. It yielded just over 7 quarts for finished syrup. Right now, we’re in a cold spell. Since we have 23 taps in my home sugarbush, and another 12 at a friends, we’re expecting a flood when it warms back up again.

See part two to this series here.

Gallon jugs fill fast. I recommend 2 gallon containers!
Seems I walk out of the woods with 5-6 gallons at a time.
The evaporator as purchased.
The valves were tweaked from being flung in a tornado.
Tweaked evaporator that needed some TLC.
I started with brute force.
I polished as I went.
Heat and pound.
The drain valve straightened.
The finished work.
Detail of warming pan.
The site for the evaporator built into a hill.
How I was considering setting it up… with the pan being over the flu for faster warming.
Te site measured off.
Footers laid.
Noticed a tree that a bug bored into and it was seeping. So, I drilled it and hung a bucket.
A beautiful sight when you enter the woods.
Overflowing… and freezing.
Ok to empty out any ice. They say there’s no suger in it.
The only walnut tree that I tapped.
The finished arch with evaporator setting on it.
Ready to cook.
The firebox with grate and flu.
Ready to cook on.
Evaporator set up and ready to cook.
Quick mortar job to level and hold smoke in.
Filled with sap.
Evaporation starts.
I let the warm sap trickle into the main without affecting the boil.
Ripping through the sap at about 4-5 gph.
Another load collecting during evaporation.
Finishin the syrup inside.
A beautiful sight.
Robbing a little late-night sugar!
The rewards.

Share it:

  • Click to share on Facebook (Opens in new window)
  • Click to share on Twitter (Opens in new window)
  • Click to share on Pinterest (Opens in new window)
  • Click to share on Reddit (Opens in new window)
  • Click to email a link to a friend (Opens in new window)
  • More
  • Click to share on Tumblr (Opens in new window)
  • Click to share on LinkedIn (Opens in new window)
  • Click to share on Pocket (Opens in new window)
  • Click to print (Opens in new window)

Filed Under: homesteading, how-to, outdoors Tagged With: homesteading, how-to, outdoors

Make Muenster Cheese

January 22, 2015 by Jason 2 Comments

I made my first two wheels of muenster cheese last week. There are many recipes out there. I used the one in the Ricki Carrolls Cheesemaking book. This particular cheese, like brie and camembert, doesn’t require you to press the cheese curds, but to simply ladle them into a mould and let the whey express via gravity. It’s considered a mold-ripened cheese. Muenster is inoculated with Brevibacterium linens (red mold) and the development of this mold contributes to its unique flavor and it also makes it slightly stinky, but not like limburger.

Rather then using my regular 2 and 4 pound moulds, I needed a special mould. They have these cool wood moulds (small, medium and large) but they are very expensive… over $100 and it just wasn’t happening. So, I made some moulds out of food-grade polypropylene. Once I had the moulds, and the special bacteria, I was ready. There’s two ways you can use the red mould. 1. you can add it during the ripening stage with the starter culture. 2. you can mix with water and spray it on the cheese before it heads into aging. I opted for the first, adding during ripening.

20150114_145535
Raw cows milk… the best for most cheeses. The curd sets firm, and has a larger yield than store-bought whole milk.

For cheesemaking, I now use the Anova immersion circulator and I don’t know what I’d do without it. You can really control the temperature, including holding the same temperature for as long as you need, and also manage the ramping of temperatures needed in most cheesemaking. If you’re really a techie, here’s the Anova Culinary Sous Vide Precision Cooker w WI-FI and Bluetooth, the same unit, but has Wifi.

I made the cheese per the recipe I was using, and once done, ladled the curds from the pot with the whey in it to the moulds. You set up the “mould-sandwich” when you use these band-type moulds. That is, a cheese board on the bottom, then a cheese mat, then the mould, then another mat, and finally, another board. (See pics below). After you evenly distribute the curds into two moulds, you let it sit for 20 minutes or so. Then, you flip the mould, and let the cheese settle back down on the other mat. You do this flipping every 20 minutes so that the cheese doesn’t bind to the mat… and it develops the skin on the outside. Muenster is not as soft as brie or camembert but the process is just the same. You have to be careful not to tear the skin on the softer cheeses. This is easy to do if you don’t flip it often enough. The soft curd settles down into the mat and if left unchecked, the mold can rather quickly start binding the cheese to the mat.

After letting the cheese sit overnight in the moulds, I took out in the morning and put them both in the salt brine for 12 hours. After 12 hours, they come out and are patted dry with a paper towel. Then , they go into a 60F/85% RH environment. I put them in a covered pan, and into my meat curing chamber since it runs a little warmer than my cheese cave.

Share it:

  • Click to share on Facebook (Opens in new window)
  • Click to share on Twitter (Opens in new window)
  • Click to share on Pinterest (Opens in new window)
  • Click to share on Reddit (Opens in new window)
  • Click to email a link to a friend (Opens in new window)
  • More
  • Click to share on Tumblr (Opens in new window)
  • Click to share on LinkedIn (Opens in new window)
  • Click to share on Pocket (Opens in new window)
  • Click to print (Opens in new window)

Filed Under: cheesemaking, food/culinary, how-to Tagged With: cheesemaking, food/culinary, how-to

Make Brie and Camembert Cheese Moulds

January 22, 2015 by Jason 1 Comment

I’ve gotten to the point in cheesemaking where I needed to buy some specialized cheese moulds. Particularly, to make cheeses in the style of brie, camembert and muenster. They have these cool band-link wood moulds in small, medium and large sizes, starting at $70 and going well over $100. I knew right away it would be a while till I could get a hold of those, so in the meantime, I’ve found that you can use sheets of food-grade polypropylene. I used 1/8″ thick sheets. If you can find it thinner, it would work, and looking back, I’d go thinner since this stuff was more difficult to bend. Here’s what I did.

20150118_151303
Two moulds, formed in hot water and plunged into cold when done. They hold their shape pretty well.

Look up polypropylene on Amazon. I found offal sheets in the size of 12″ X 24″ for like $10-12. Free shipping for Prime Members. It was perfect really. One sheet made two moulds. Actually, I think these turned out a tad too tall. You could cut the sheet in thirds and get 3 perfect moulds. At the time, I cut it in half and made strips for two moulds.

To bend them, you have to boil water in a big pot on the stove. Get your biggest. Even the one I used was a little small (looking back). Once boiling, put and end of the sheet in the water to soften it. It works fast. Flip is and put the other end in. I was able to bend it enough to contour around the side of the pot I was using. I let it go for about 2 minutes. Then, used tongs to pull it out. It was soft enough to roll up tighter and tie some twine around it. it’s ok to make smaller than your final mould will be. It will want to unwind slightly after it’s done. Put it back in to boil for a couple of minutes, and fill up your sink with cold water. Remove the moulds from the pot and plunge into cold water while still tied. Let it cool, and you’re done.

That’s all there is to it. I go ahead and store them with the twine around them to help keep the sized shape I want for next time. Let me leave you with a word of caution. I did scald myself. I decided to get a wooden spoon and try to push the moulds down into my boiling pot of water a little more. They were somewhat flexed against the edges of my pot, so they were a little tight. I was pushing hard enough when the spoon slipped off the edge of the mould and pretty much plunged my hand into the pot of water. It was a quick scald. My hand totally made it… but the tender area around my wrist is what took a second degree. Also, while flexing the mould getting into the water–and perhaps out as well–be mindful that any tension on the plastic could spring and splash hot water on you. I’m pretty good around a stove, yet I managed to get a pretty good burn. Be careful.

Start with your cut sheet.
Here it is bent around the sides of a pot of hot water.
I had taken it out and rolled it tighter and tied with twine before putting back in.
Here are the finished moulds.
Here are the moulds in action. That’s muenster in there.
Here’s the cheese in the mould.
Here’s the cheese ready for brine.
Here’s the mark left on my wrist from a good scalding.

Share it:

  • Click to share on Facebook (Opens in new window)
  • Click to share on Twitter (Opens in new window)
  • Click to share on Pinterest (Opens in new window)
  • Click to share on Reddit (Opens in new window)
  • Click to email a link to a friend (Opens in new window)
  • More
  • Click to share on Tumblr (Opens in new window)
  • Click to share on LinkedIn (Opens in new window)
  • Click to share on Pocket (Opens in new window)
  • Click to print (Opens in new window)

Filed Under: cheesemaking, do-it-yourself, food/culinary, how-to Tagged With: cheesemaking, do-it-yourself, food/culinary, how-to

Drying peppers and making hot pepper powder

January 15, 2015 by Jason 6 Comments

I love peppers! All kinds, many kinds. I bring many pepper plants inside to overwinter. Some, I cut down for bonchi (making small pepper trees like bonsai) and others just to have ready to go back out the following year. For all my hotter varieties, I make hot sauce, or dehydrate and grind them down into a pepper powder that I use for charcuterie, or for just sprinkling on food.

Really simple stuff. The big thing is, when you harvest your peppers, don’t just let them sit around. First thing, give them a good wash while they are still firm. From here, they need to dry out. So, it doesn’t make sense to toss them on the counter to have them start drying only to have to come back and wash them. Once they are washed, sit them on a clean towel to soak up most of the water. Roll them around if you like. Move them off the towel after a day or so as you don’t want the moisture in the towel against the peppers any longer than necessary.

An assortment of hot pepper powders from the pantry.

Move them to a sheet of cardboard, or I’ve used shoe boxes and lids before for smaller quantities. Don’t stack them. All should be laying flat to dry. Here is where you could leave them for a couple days if you didn’t have the immediate time. Otherwise, move them right into your dehydrator. The idea is to get them cleaned, and dried for the dehydrator before any mold starts inside. For the extra-paranoid type, you can cut the peppers in half. They will dry faster and if you are not using a dehydrator, then I especially recommend cutting them in half. See some safety tips below regarding handling the peppers.

Once you have them thoroughly dried out, watch out! It doesn’t take much to get it airborne. We’ll be grinding the peppers in the next step, and here too is where a respirator (or doing it outside) can be beneficial. For every cup of dried peppers, add a teaspoon of course salt… kosher or sea salt is fine. I used an apple wood, smoked sea salt this time, and it added an incredible smoky taste to my carolina reaper powder. Put all in a spice grinder or food processor, and grind until it has the coarseness you want. If you want flakes, grind only a little. For a powder grind a little more. It only takes a second! You can turn this dry mass of peppers into powder in under 5 seconds in a spice grinder, so grind a little and look at it… then grind more.

As you can imagine, there is a cloud of pepper powder in your grinder at this time. When you open it, it will be everywhere, trust me. Either do it outside, or have on a mask and eye protection. Serious, this can burn you up if even a little powder gets in your eye, on your face, or in a lung! Basically, you want to get it all out of your grinder and right into a jar with a lid on it as quickly and as efficiently as possible.

That’s it, enjoy!

A few safety tips on handling peppers of the hotter variety

Make sure you have the right gear for handling peppers. Don’t think your less of a person if you wear rubber gloves, eye-glasses and even a face-mask. Serious, I’m a pretty tough pepper-eater, but cutting up the carolina reapers (just in half) the other day had me choking. Open the windows or turn on your stove exhaust fan and cut them near there. I don’t recommend a fan as that blows it through the house and has everyone else choking too. This has happened more times than once in my house, even with my best effort to prevent it.

An assortment of hot pepper powders from the pantry.
Making carolina reaper pepper powder.
Dehydrated peppers and smoked sea salt.
Dehydrated carolina reaper peppers.

Share it:

  • Click to share on Facebook (Opens in new window)
  • Click to share on Twitter (Opens in new window)
  • Click to share on Pinterest (Opens in new window)
  • Click to share on Reddit (Opens in new window)
  • Click to email a link to a friend (Opens in new window)
  • More
  • Click to share on Tumblr (Opens in new window)
  • Click to share on LinkedIn (Opens in new window)
  • Click to share on Pocket (Opens in new window)
  • Click to print (Opens in new window)

Filed Under: food/culinary, homesteading, how-to Tagged With: food/culinary, homesteading, how-to

  • « Previous Page
  • 1
  • …
  • 6
  • 7
  • 8
  • 9
  • 10
  • …
  • 39
  • Next Page »

Search the site

Recent Posts

  • Seasoned cauliflower & quinoa burgers May 7, 2021
  • Preserved Black Walnuts January 17, 2020
  • Nocino Walnut Liqueur July 25, 2019
  • Requeening honeybee colonies with cells July 9, 2019
  • Mushroom Jerky May 27, 2019

Archives

Categories

  • beekeeping (40)
  • charcuterie (13)
  • cheesemaking (7)
  • do-it-yourself (15)
  • family (20)
  • food/culinary (47)
  • friends (21)
  • gardening (3)
  • genealogy (15)
  • grape growing (10)
  • health (3)
  • homesteading (38)
  • how-to (67)
  • music (3)
  • outdoors (30)
  • rants (6)
  • recipe (21)
  • Uncategorized (40)
  • videos (22)
  • winemaking (21)

About AllMorgan

AllMorgan started as a family blog to keep extended family and friends around the world apprised on what's going on at the Morgan Ranch. Over the years, it grew in to something so much more.

Learn More

Welcome to AllMorgan

AllMorgan started as a family blog to keep extended family and friends around the world apprised on what's going on at our Indiana homestead. It always been a cross between a family diary and photo … Read more

Did you know?

The queen bee doesn’t decide what happens in a colony. The workers do. They adjust her feeding to make her do what the majority says. The queen can’t feed herself.

Copyright © 2025 · Outreach Pro on Genesis Framework · WordPress · Log in

…
…
…
…