AllMorgan

Visit us on

  • Email
  • Facebook
  • Instagram
  • LinkedIn
  • Pinterest
  • RSS
  • YouTube
  • Home
  • About
  • Beekeeping
  • Homesteading
  • Winemaking
  • Genealogy
    • The Morgan Family Today
    • Getting Started in Genealogy
    • Favorite Genealogy Links
  • Store
You are here: Home / Archives for Jason

Seasoned cauliflower & quinoa burgers

May 7, 2021 by Jason Leave a Comment

My take on the cauliflower burger. I love cauliflower and have always just made the steaks where you slice drizzel with oil and season the way you like before baking. The first time I tried a cauliflower burger, I was in love all over again.

I drove over to a friends house, and pulled into his driveway… before I could get out, he jams this sandwich in the window and said “here, try this and tell me what it is.” Being the foodie I am, I happily obliged.

A nice bun, onions, pickles and something that appeared fried. Taking a bite, it was firm and steamy. Delicious. With the pickles and onions, I said “a mild white fish.” Wow, I couldn’t have been further off. The sandwich was from a reputable local establishment. They had their process. Cauliflower. Steamed just enough, pulsed in the food processor to leave some chunk… and mixed with a delicious spice profile.

I had to try and recreate it. So first, like always… Google. There is no shortage of cauliflower recipes out there, each with their own take. I selected the one that sounded like it could render the result I was looking for. It turned out pretty good, but it was far off. The texture was much finer than the chunkier, white fish-like interior of my first. It also lacked the caramelized crust that I actually thought was breading.

So for the next attempt, I spent more time thinking about the process. I cut the florets off a head of cauliflower and washed fewer bigger pieces.

Then, laid them out on parchment paper in a sheet pan. I keep olive oil in a sprayer for times like these. Spray the florets (or drizzle) liberally with olive oil, and sprinkle with salt, pepper and cumin.

Bake for 30 minutes. While it’s baking, rinse 1 cup of quinoa, drain and add 2 cups of water and bring to a boil on the stove. Once boiling, cover and simmer for 15 minutes. Don’t ovecook this. After 30 mins, take the lid off and fluff, and leave aside to cool.

When the cauliflower comes out of the oven, you want it soft enough to bite, but still firm. You don’t want it anywhere near mushy as they still have to hold up in the food processor and the mixing.

Transfer these big, seasoned chunks into the food processor in shifts, not all at once. No stacking.

Pulse a few times and dice it to your desired consistency. I like it chunky, but there is a point where too large of chunks will not let it hold together and they will break apart during cooking. Let’s say no smaller than rice, and no larger than peanuts. Well, for me, maybe a bit larger. Finish pulsing the rest of your cauliflower.

Next, make up your spice mix. The options are unlimited here, but here’s what I did.

To a mixing bowl, add 1 cup of fine breadcrumbs and the quinoa. To that, add 3 eggs and 3/4 cup of grated asiago, parmesan or your favorite hard cheese, 1 Tbs of olive oil, 3-4 cloves of crushed garlic and 1 tsp of cumin. I also added a Tbs of my homemade Worcestershire sauce. If you want it spicy, add cayenne pepper flakes. I had to hold them this time because this was the family dinner tonight.

To this bowl of goodness, add your grated/pulsed cauliflower and mix well. During this mixing, you may break up some of the larger pieces as well. Again, too large of pieces won’t let the binder hold it together (which is mainly the eggs and gluten from the breadcrumbs).
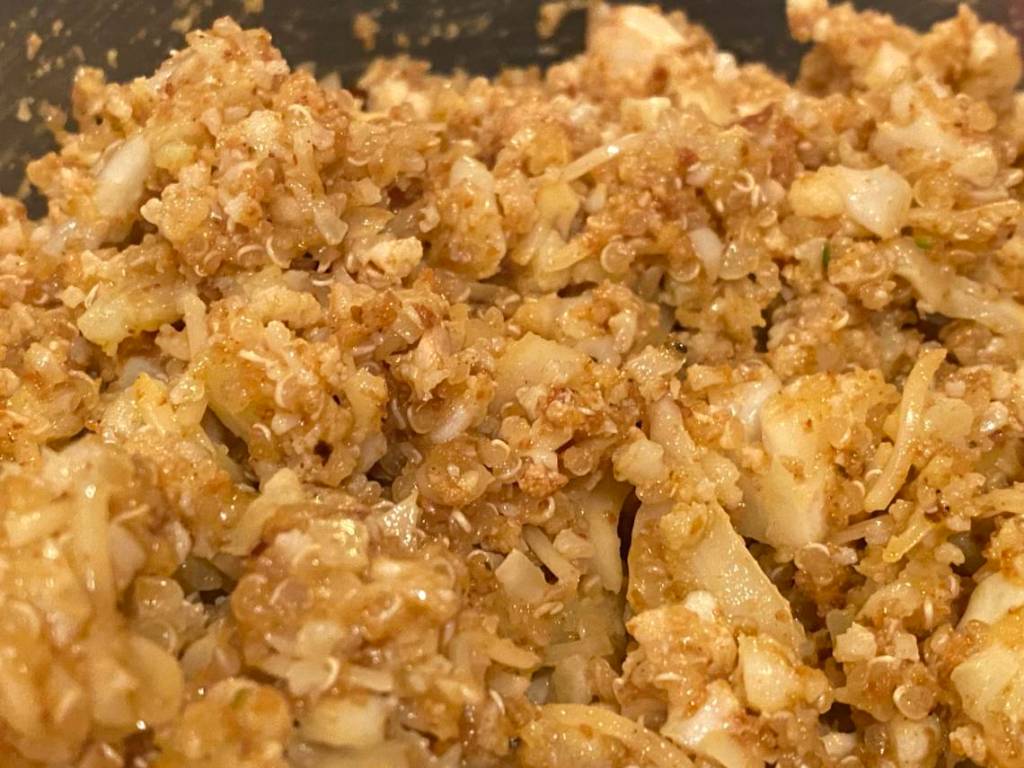
Form the patties and heat an iron skillet with some olive oil up to high heat. Add the just-made patties, listen for the sizzle, then turn the heat down to medium. They fry up nice in the iron skillet right away.

I make a double batch, form them into patties and par-freeze before vac sealing. They make a quick meal later. I have also laid the frozen patties on the grill and slow grilled, flipping only once.

With about 6-7 minutes on each side over medium heat, they caramelized up nicely, and had the crispyness of something battered and fried.

From here, choose your bun. I’ve tried a basic potato bun that was fantastic, and this go-round, I used some sourdough I made earlier in the day. Add your favorite condiments. Pickles and onions are essential for me, and on my next ones, I’ll add pickled onions. Some cilantro doesn’t sound half-bad… and if you really want to be bad, add a dollop of chipotle mayonaise. Tarter sauce if you are heading toward a fish-like sandwich.

You can see how easy it is to change these up to your tastes. You can even manage to make it vegan or vegetarian. Hold the eggs and cheese, and cook the quinoa longer. The gluten from the bread crumbs also helps bind. You can drop the breadcrumbs and find a more preferred binder to add in to help hold it together when cooking. Have fun.

Share it:

  • Click to share on Facebook (Opens in new window)
  • Click to share on Twitter (Opens in new window)
  • Click to share on Pinterest (Opens in new window)
  • Click to share on Reddit (Opens in new window)
  • Click to email a link to a friend (Opens in new window)
  • More
  • Click to share on Tumblr (Opens in new window)
  • Click to share on LinkedIn (Opens in new window)
  • Click to share on Pocket (Opens in new window)
  • Click to print (Opens in new window)

Filed Under: food/culinary, health, recipe Tagged With: food/culinary, health, recipe

Preserved Black Walnuts

January 17, 2020 by Jason Leave a Comment

Here is the “other” black walnut project I have been working on in addition to the nocino. I am working on preserved walnuts. Not pickled, mind you. This is important to understand because these come out as soft, sweet little baklava-tasting delights! I have been fascinated by this ever since my friend Terrie gave me some to try back in January. Reading up, this is an Armenian tradition… and I hear that you can maybe find these at Armenian groceries… but I know of none nearby me. At first bite, I said, “oh, I gotta try to make these.” She concurred. Notice how one immediately found its way on to a bit of Brie that I made. You can see that the nut is not at all formed… and it appears the walnut shell actually formed and it should be rock-hard… but really, it’s soft, and has a hard-to-explain texture that I’ll just leave at divine. Oh… I should mention they are best served cold too. I would never have believed it. Turns out, you can order these exact ones online at Murray’s Cheese as a compliment to a meat and cheese plate. You’re welcome. Now, on to trying to replicate…

Pick some green walnuts… I used 60 in my batch.

I started with “green” walnuts that had to be smacked off the tree prematurely. My friend Jim had a great tree, but it was big… and that meant a ladder, and a long pole to smack them off. I got a 5g bucket full… which turns out, goes a long way. I ended up making a double batch of nocino and a double batch of preserved walnuts and still threw out almost half a bucket full. For the preserved walnuts, we have to peel the skins. I started with a potato peeler and it worked pretty well… then after understanding you have to poke some holes in them, I took the corer off my apple peeler, stuck them on and turned them through. It too worked OK, but if the nuts were odd-shaped, you had to come back and fine tune it with the peeler. I made it through, and of course, yes… you should wear gloves. When young, the juice is clear as you are peeling… but then it darkens and will stain your hands… and the table. My wife loves the new dark spots on the table from the splashes off the cutting board.

Peel the skin off the walnuts and poke a few holes in them to allow water and syrup to penetrate later. Note the gloves… wipes up splashes quick… it stains everything, even a coated table.

So, we have them peeled and poked. Now, we soak them in clean water… and we dump and change the water 1-2 times a day for at least 10 days. I was pretty diligent about this and in fact, I’m on day 16 today because it has taken me a while to get back to this. During the soaking is where most of the bitterness is removed. The water turns foamy and dark… then you dump and change it out every day. On day 10, you can add in some pickling lime to the water for 24 hours if you want to keep a more firm preserve, just do one final clean soak with no lime before moving to the next step.

The water get’s nasty… when it looks like this… change it out. I finally used a plate to hold them all under the surface. Air does oxidize them and they start turning brown quickly.

Today, I boiled a big pot of water then dumped the walnuts into it and let them boil for 20 minutes. Here, the water turns almost black and so do the nuts… (pics below). They are really soft now. I have them laid out on a towel to dry for a couple hours. For 130 walnuts, I’ll use about:

Here, they are laying out to cool and dry before going into the simple syrup

10-12 cups of water
4 lbs of honey (I’m thinking a maple syrup version next)
The goal with the above is to have a close ratio to nut and liquid. In the end, all of this syrup will be poured into the jars with the preserves. I’m shooting for a thicker syrup and may add more honey in the end (if needed) to achieve that.

This is where I am right now in the process. I will boil just the honey and water, then dump in the walnuts and cook them for 30 minutes. Since I can’t finish them tonight (they will be canned) I’ll cover and leave them to cool overnight to finish tomorrow.

Tomorrow, the plan is to reheat the nuts and syrup, adding in;

1 T citric acid (or 3 T of lemon juice)
2 t cardamom (or 4-5 crushed pods)
2 t cinnamon
1 split vanilla bean

I had considered some star anise, but saved that for the nocino. I can think of several other possibilities but will leave them for the next time.

Cook for another 20-25 minutes or until they have the desired firmness. The entire mixture, nuts, and syrup will be dumped into clean hot jars, and then canned in a water-bath.

Here, the nuts are steeping in the honey/water mixture.

I’d say they can be eaten immediately as they are already soft enough, but like anything, I suspect they’ll develop some character over time and I plan to keep some up on the shelf as long as possible. I’ll post the remaining pics soon but see my commentary on each pic for more detail.

  • A walnut preserve on my own brie… and a cracker.
  • Pick some green walnuts… I used 60 in my batch.
  • Peel the skin off the walnuts and poke a few holes in them to allow water and syrup to penetrate later. Note the gloves… wipes up splashes quick… it stains everything, even a coated table.
  • Soak the nuts in clean water… changing it 1-2 times daily to reduce the bitterness.
  • A peeled clean young black walnut.
  • The water get’s nasty… when it looks like this… change it out. I finally used a plate to hold them all under the surface. Air does oxidize them and they start turning brown quickly.
  • Here’s what they look like after 16 days of soaking and rinsing. They are relatively soft and darkened.
  • Jason Morgan‎The Morgan Ranch Admin · July 12, 2018 · I boiled enough water to have all the nuts submerged… and then dumped in the nuts to boil for 20 minutes.
  • Here, they are laying out to cool and dry before going into the simple syrup
  • Here, the nuts are steeping in the honey/water mixture.
  • The finished product was canned in a water bath.
  • A close up of sealed jar.

Share it:

  • Click to share on Facebook (Opens in new window)
  • Click to share on Twitter (Opens in new window)
  • Click to share on Pinterest (Opens in new window)
  • Click to share on Reddit (Opens in new window)
  • Click to email a link to a friend (Opens in new window)
  • More
  • Click to share on Tumblr (Opens in new window)
  • Click to share on LinkedIn (Opens in new window)
  • Click to share on Pocket (Opens in new window)
  • Click to print (Opens in new window)

Filed Under: Uncategorized

Nocino Walnut Liqueur

July 25, 2019 by Jason 1 Comment

I have to give credit to Tim Artz at Tim’s Food Obsession for my discovery of Nocino. I discovered his blog, and Nocino about three years ago and per his instruction, have been making it each June ever since. It’s too easy and rewarding not to, and it harkens to my inner soul about capitalizing on what’s currently in season.

Tim instructs us on the 24th of June, collect 24 walnuts. Well, it was a little earlier than that for me this year, and I’m usually collecting many more so that I can also make the walnut preserves that I also like to make. I’ve found the preserves want the walnuts even younger. In both cases, it entails collecting young, green walnuts that have to be knocked off the tree. The idea is to collect them well before the shell begins to harden or nut begins to form. In my case, I’m collecting black walnuts here in SE Indiana.

Nocino is a thicker, dark brown liqueur originating in the Emilia-Romagna region of Northern Italy. We try to collect the walnuts avoiding oxidation by not scaring them or leaving them to sit too long before placed in an alcoholic base. In this case, we use Everclear and steep the quartered walnuts for about 40 days along with other spices and flavorings.

Once steeping is done, it’s mixed with a simple syrup to sweeten. Nocino has an aromatic and bittersweet, flavor. Individual Italian families often have their own recipes that include variations like the addition of cinnamon, juniper berries, lemon or orange zest, vanilla pods, coffee beans, and clove. I can always dig into anything that encourages the imagination to run wild. So in my latest batch, here’s what I did.

Collect green walnuts and wash them!

Collect, clean and quarter the walnuts. I have recently read that boiling the walnuts ahead of time helps with the steeping stage. I plan to try this sometime. If there is one thing I’d like to have more control over, it’s the bitterness in Nocino. Last year, I ran it through a fine wine filter to get out the fine tannic-heavy particles that seem to settle on the bottom to see if it helps.

Load the ingredients into a jar and top up with 100% Everclear for the steeping stage. Keep track of how many liters of alcohol is used as this will be needed to calculate the sweetening stage later.

Walnuts for Nocino only need to be quartered, but I’m also peeling them for the preserved walnuts.

Once done steeping, about 40 days… strain out everything leaving just the liqueur and filter through whatever you have… I’ve tried coffee filters, layers of cheesecloth, and again, even a dedicated wine filter. The idea is to get out the black sediment that you will see that contributes to the bitterness. It does stop up the filters and takes a while for it to get through.

Quartered walnuts nixed with cinnamon sticks, cloves, star anise, vanilla bean and chopped orange peel.

Measure your liquid volume and you will be cutting this to the proof you desire. Remember, this is still as hot as Everclear. Tim suggested 80 proof. I’m between there and 70 proof.  For each liter of alcohol you used, add 800 grams of sugar.  I used honey last year and did like it but I admit, I went by taste… since I had already cut the alcohol to a palatable proof. Heat just until your sweetener is dissolved. It takes no heat at all with honey since it’s water-soluble.

From here, I did add mine back to the bulk glass vessel and let it settle out for several more months racking it off the bitter sediment that settled to the bottom from time to time. I’m just now getting to bottle last years Nocino. I do believe a bit of bottle age is important just like in wine… so, we’ll give it another month or so before trying it out. After all, I have this years batch to keep me busy for a while.

I’d love to hear tips or ideas from others who make Nocino!

  • Collect green walnuts and wash them!
  • Collect green walnuts and wash them!
  • Walnuts for Nocino only need to be quartered, but I’m also peeling them for the preserved walnuts.
  • Peeling for preserved walnuts is not necessary for Nocino.
  • Quartered walnuts nixed with cinnamon sticks, cloves, star anise, vanilla bean and chipped orange peel.
  • Quartered walnuts nixed with cinnamon sticks, cloves, star anise, vanilla bean and chipped orange peel.
  • Set outside for around 40 days. It will start to turn black.

Share it:

  • Click to share on Facebook (Opens in new window)
  • Click to share on Twitter (Opens in new window)
  • Click to share on Pinterest (Opens in new window)
  • Click to share on Reddit (Opens in new window)
  • Click to email a link to a friend (Opens in new window)
  • More
  • Click to share on Tumblr (Opens in new window)
  • Click to share on LinkedIn (Opens in new window)
  • Click to share on Pocket (Opens in new window)
  • Click to print (Opens in new window)

Filed Under: Uncategorized

Requeening honeybee colonies with cells

July 9, 2019 by Jason Leave a Comment

In this video, I am pulling queens from hives that are not performing to my standards. Reasons range from poor laying patterns, aggressive behavior… anything that I don’t want to see in my colonies. There are many philosophical views on this, but for me, making up new splits or re-queening poorly-performing colonies helps ensure I have several good hives going into the next season. I consider them my honey-making hives. A young, vigorous queen can help prevent swarming, help mite control, fast build-up in the spring and many other “ailments” to a hive.

I don’t just re-queen automatically… but I do select the colonies that are not performing the way I want them to. I’ll let these hives be queenless for at least 24-hours to help them more readily accept the new queen cells. Another thing I do not mention in the video is to make sure you search for any queen cells left in the hive as well. A couple of hives already had supersedure cells in them (meaning the bees had already planned to replace their queen) and we don’t want these queens emerging and destroying the new queen cells we’re putting in the hives.

Do you ever replace queens in your colonies? If you do, I’d love to know why in the comments below.

Share it:

  • Click to share on Facebook (Opens in new window)
  • Click to share on Twitter (Opens in new window)
  • Click to share on Pinterest (Opens in new window)
  • Click to share on Reddit (Opens in new window)
  • Click to email a link to a friend (Opens in new window)
  • More
  • Click to share on Tumblr (Opens in new window)
  • Click to share on LinkedIn (Opens in new window)
  • Click to share on Pocket (Opens in new window)
  • Click to print (Opens in new window)

Filed Under: beekeeping, homesteading, how-to, videos Tagged With: beekeeping, homesteading, how-to, videos

Mushroom Jerky

May 27, 2019 by Jason Leave a Comment

During morel season, sometimes you come home empty-handed. But, better than that, one could come home with a few dryads saddles i.e. pheasant backs. If really lucky, one could find a huge lions mane mushroom. Well, I was lucky to find all the above. It was a great year for morels… and I never have problems finding the saddles. This year, I found my first lions mane mushrooms… three in fact. It took me two weeks creating various recipes to use them up and it was easy. Both saddles and lions manes are thick and fleshy and can be easily marinated and cooked like chicken.

It made sense to take it a notch further. What about jerky? If I’m marinating it before searing, what about marinating it before drying? So, I mixed up a jerky marinade and tried drying them out. It was a raging success and it’s something I can’t wait to do again. To be clear, I didn’t invent it, but I remember seeing someone do it with saddles in the past and it’s been on the list to do ever since.

The base of my marinade is comprised on whatever Mexican chili peppers I have on hand. This time, it was a pasilla, two guajillos an ancho and a chipotle. Now, I was calling it vegan… but I cheated (I’m not vegan after all). I put Worcestershire sauce in it (it’s fermented with anchovies)… but vegans can just hold that if they like. Soy sauce, or a nutritional yeast can give it a umami profile.

It was about a total of 1 pound of saddles + lions manes, the peppers, and to the marinade, I added eye-balled amounts of salt, pepper, soy, worchestershire, lemon juice and curry powder. Obviously, you can get creative and even use an entirely different recipe. Use your favorite jerky marinade. I just knew I wanted something thick so that it stuck to the shrooms even after it was dry. The chili’s turned to a paste that was even a little sticky once it was dry. It really could pass for a meat jerky.

See the captions on the photos for detailed info, and if you try it, post below and let me now how it turned out!

  • Cleaned and quartered lions mane.
  • Cleaned and sliced saddles.
  • L-R, Guajillo, Ancho, Pasilla and Chipotle.
  • Chilis boiled in a little water to soften for pureeing.
  • Peppers deseeded, boiled with a little water, and blended to a puree in a food processor. Other spices added.
  • The shrooms are mixed real good in the marinade.
  • I covered them with plastic wrap and put in fridge for about 12-20 hours.
  • Laid out in dehydrator and dried on low heat.
  • The finished stuff, looks and smells like jerky and to a vegan (that I am not) the taste was working well!
  • Close up of mushroom jerky.

Share it:

  • Click to share on Facebook (Opens in new window)
  • Click to share on Twitter (Opens in new window)
  • Click to share on Pinterest (Opens in new window)
  • Click to share on Reddit (Opens in new window)
  • Click to email a link to a friend (Opens in new window)
  • More
  • Click to share on Tumblr (Opens in new window)
  • Click to share on LinkedIn (Opens in new window)
  • Click to share on Pocket (Opens in new window)
  • Click to print (Opens in new window)

Filed Under: food/culinary, recipe Tagged With: food/culinary, recipe

  • 1
  • 2
  • 3
  • …
  • 39
  • Next Page »

Search the site

Recent Posts

  • Seasoned cauliflower & quinoa burgers May 7, 2021
  • Preserved Black Walnuts January 17, 2020
  • Nocino Walnut Liqueur July 25, 2019
  • Requeening honeybee colonies with cells July 9, 2019
  • Mushroom Jerky May 27, 2019

Archives

Categories

  • beekeeping (40)
  • charcuterie (13)
  • cheesemaking (7)
  • do-it-yourself (15)
  • family (20)
  • food/culinary (47)
  • friends (21)
  • gardening (3)
  • genealogy (15)
  • grape growing (10)
  • health (3)
  • homesteading (38)
  • how-to (67)
  • music (3)
  • outdoors (30)
  • rants (6)
  • recipe (21)
  • Uncategorized (40)
  • videos (22)
  • winemaking (21)

About AllMorgan

AllMorgan started as a family blog to keep extended family and friends around the world apprised on what's going on at the Morgan Ranch. Over the years, it grew in to something so much more.

Learn More

Welcome to AllMorgan

AllMorgan started as a family blog to keep extended family and friends around the world apprised on what's going on at our Indiana homestead. It always been a cross between a family diary and photo … Read more

Did you know?

The queen bee doesn’t decide what happens in a colony. The workers do. They adjust her feeding to make her do what the majority says. The queen can’t feed herself.

Copyright © 2025 · Outreach Pro on Genesis Framework · WordPress · Log in